Why Getting Your Concrete Pad for Shed Right Matters From the Start
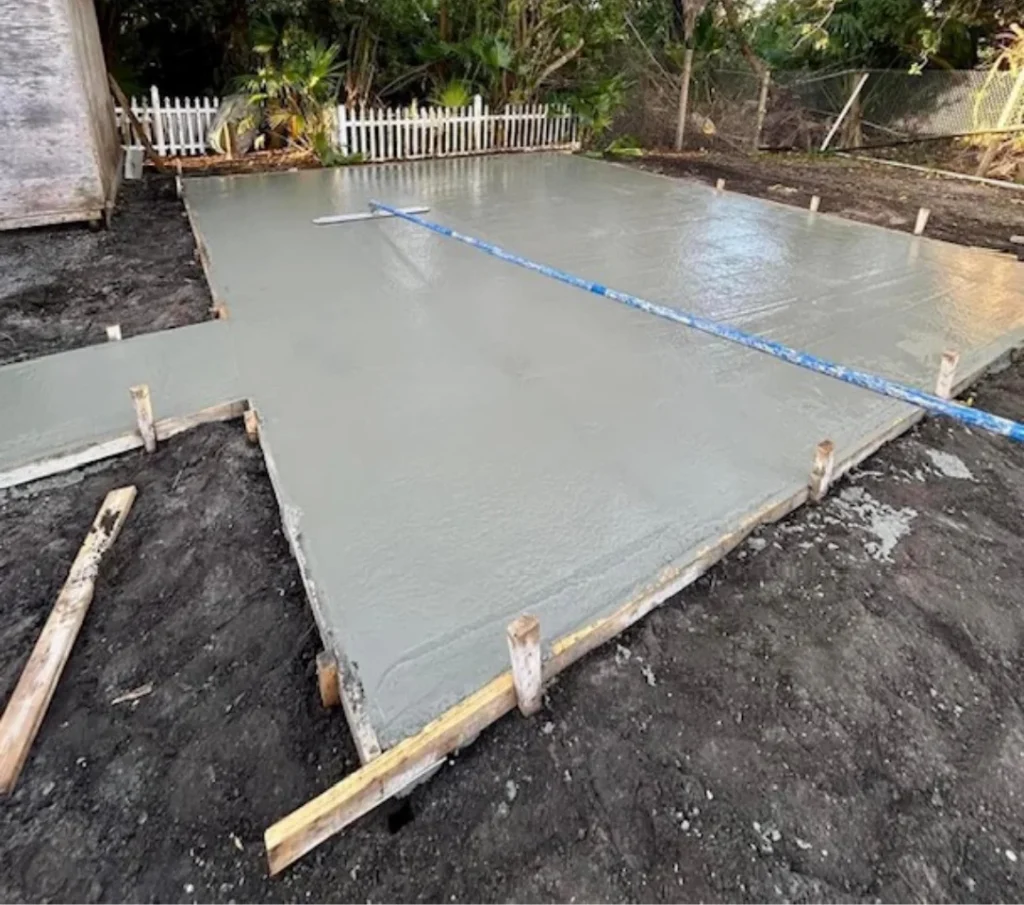
Building a concrete pad for shed projects in Brevard County comes down to six core steps:
- Excavate and grade the site, removing sod and organic material
- Build and level your formwork using pressure-treated lumber
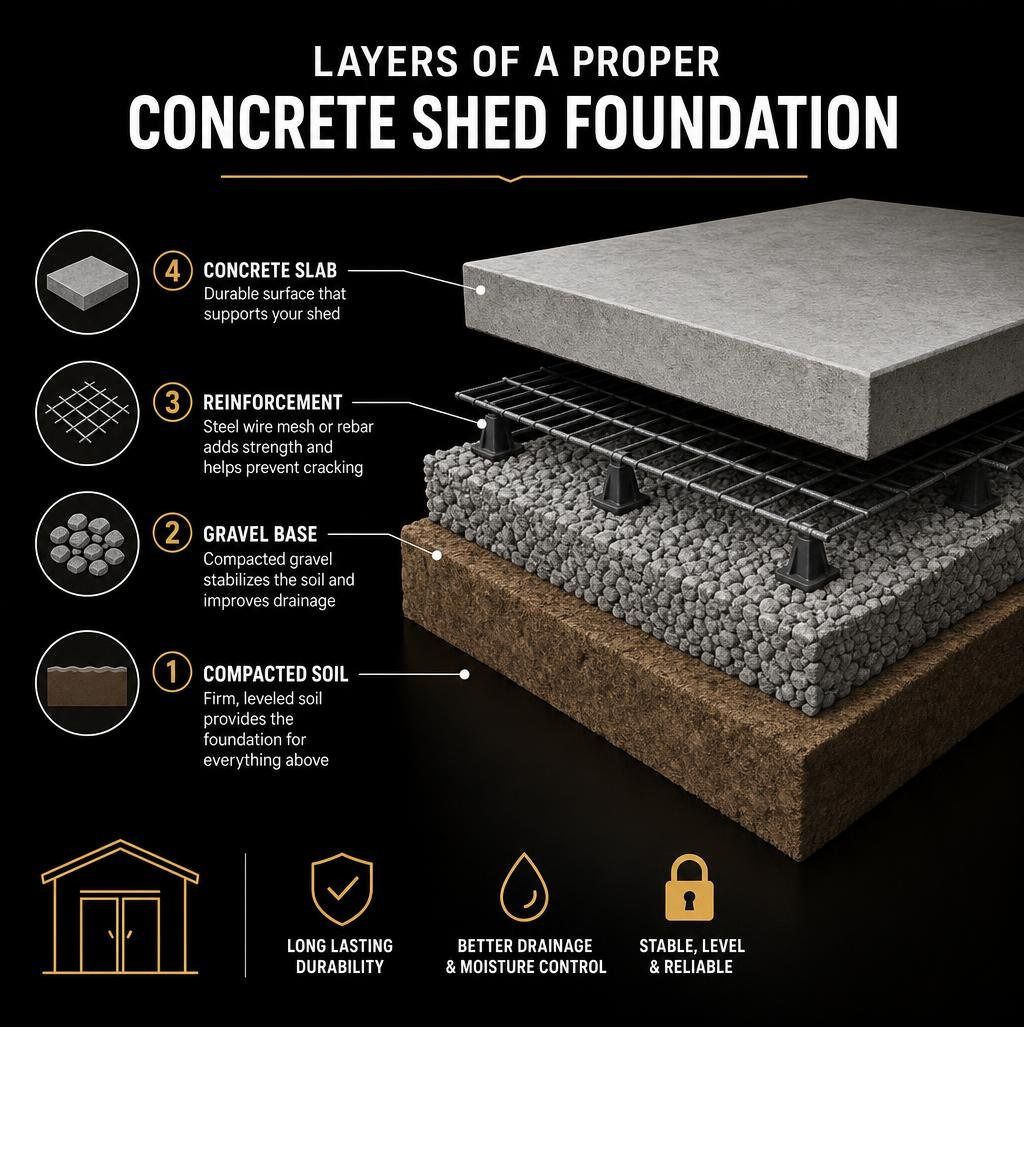
- Compact a gravel sub-base to stabilize sandy soil and manage drainage
- Install steel reinforcement (wire mesh or rebar) elevated on chairs
- Pour and finish the concrete, using a broom finish for slip resistance
- Cure properly, keeping the slab moist for at least 7 days before building on it
Before you start framing a shed, you need something solid underneath it. A concrete slab is one of the most reliable foundations you can choose, especially here in Brevard County where sandy soil, seasonal downpours, a high water table, and salt air can quickly undermine anything temporary.
Get the foundation wrong and you are looking at a shifting, cracking, or settling structure within just a few years. Get it right and a properly poured slab can support your shed for decades without major issues.
Florida’s climate adds challenges you simply do not face in most other states. Intense heat speeds up surface drying during a pour. Heavy summer rain can wash out an unprepared base overnight. Pests like termites and rodents move easily through loose dirt or wood-contact setups. A well-built concrete pad eliminates most of these risks from day one.
I’m John DomBek, owner of JCD Concrete Inc. and a residential concrete contractor with over 40 years of hands-on experience serving homeowners across the Space Coast, and I’ve seen how a properly built concrete pad for a shed holds up against Brevard County’s toughest conditions. In this guide, I’ll walk you through exactly how we approach these projects so you know what a quality installation looks like from start to finish.
Why a Concrete Pad for Shed Foundations Beats Temporary Options
When planning a new backyard structure, it is tempting to look for shortcuts. However, choosing a temporary foundation often leads to structural issues down the road. In East Central Florida, our unique coastal environment demands a foundation that can handle high humidity, seasonal tropical storms, and shifting ground.
By opting for a permanent poured concrete slab, you create a durable, long-lasting foundation that helps protect against moisture, erosion, and ground movement. We design our slabs to resist the specific challenges of our local environment, including soil washouts, a high water table, and heavy seasonal rainfall. Our professional concrete flatwork provides a level, durable surface that keeps your structure square and your stored items dry.
Whether you are building a small tool shed in Palm Bay or a large workshop in Titusville, investing in a permanent slab is the best way to safeguard your property. If you are planning other backyard upgrades alongside your new shed, you can explore our full range of residential concrete services to see how we can help transform your outdoor space.
Why a Concrete Pad for Shed Projects Outlasts Temporary Wood and Dirt Bases
Temporary foundations, such as pressure-treated wood skids laid directly on the ground, loose cinder blocks, or simple dirt bases, quickly degrade under Florida’s intense weather conditions. Wood platforms are highly susceptible to rot, fungal decay, and termite infestations. Even pressure-treated lumber can deteriorate over time when exposed to Florida’s moisture, termites, and challenging soil conditions.
Furthermore, loose concrete blocks or pavers laid on unprepared dirt will inevitably shift. When heavy seasonal rain falls, water can pool around the base of your shed, causing the soil underneath to wash out. This leads to uneven settlement, which warps your shed’s frame, binds the doors, and cracks the walls.
A professionally poured concrete slab, on the other hand, acts as a single, continuous unit. It distributes the weight of your shed and its contents evenly across the entire footprint. This prevents individual corners from sinking into our sandy soil, keeps burrowing pests from making a home beneath your floor, and protects your stored tools and equipment from rising ground moisture.
Planning Your Concrete Pad for Shed Projects: Thickness, Reinforcement, and Local Codes
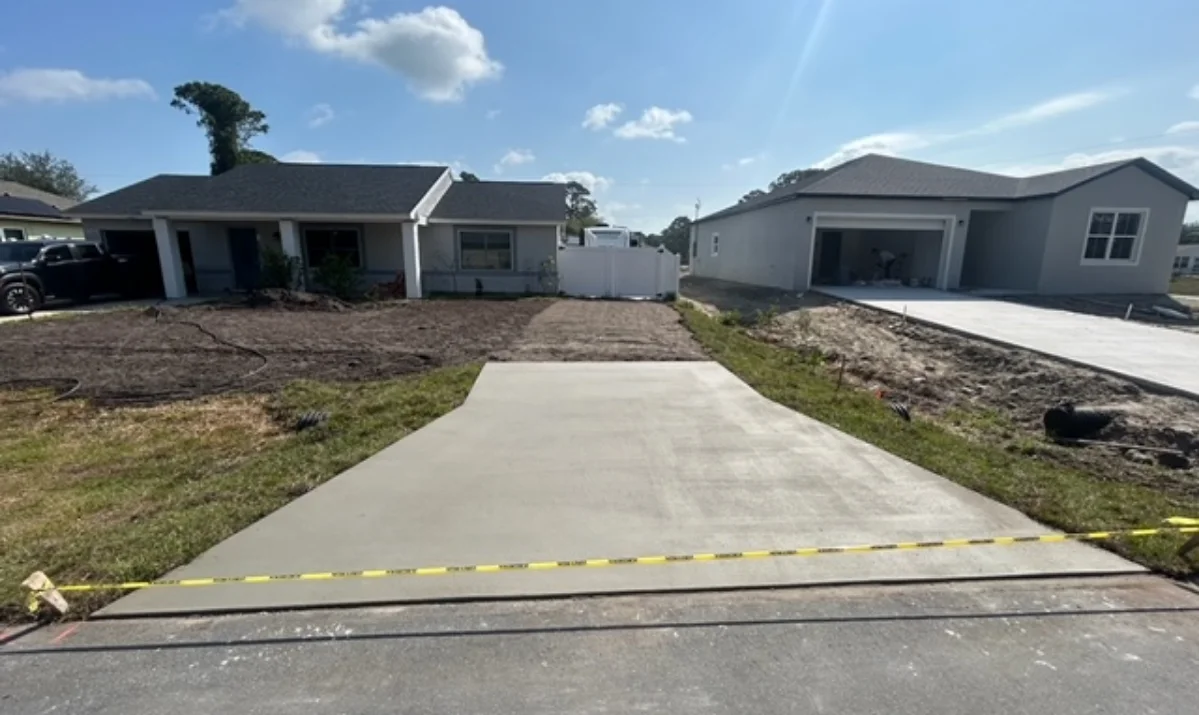
Proper planning is the secret to a successful concrete pour. Before any dirt is moved, a professional contractor should evaluate the slab location, intended shed use, drainage path, access, setbacks, and soil conditions. Building requirements can vary across Brevard County, from coastal wind exposure near Cocoa Beach and Satellite Beach to property layout considerations in Melbourne, Palm Bay, and Titusville.
For homeowners, this planning stage is where professional guidance matters most. A shed foundation is not just a flat square of concrete; it needs the right thickness, base depth, reinforcement layout, slope, and finish for the structure it will support. JCD Concrete Inc. helps homeowners plan concrete pads and slabs that are built for long-term use in Brevard County’s sandy soil and heavy seasonal rainfall.
Drainage is especially important in Central Florida. The ground around a shed slab should be graded to move stormwater away from the foundation instead of allowing water to pool at the edges and erode the base. On properties with larger water-management needs, related improvements such as concrete culverts can help direct runoff and protect access areas, driveways, and low-lying sections of the property.
Choosing the Right Concrete Pad for Your Shed
The right concrete pad for storage shed projects depends on how the space will be used. While all concrete pads for sheds share the same basic purpose, the ideal slab design varies depending on the structure, load requirements, and site conditions. A small lawn-equipment shed, a concrete pad for garden shed, and a larger workshop-style structure all place different demands on the foundation. The goal is to create a stable concrete floor for shed use that stays level, drains properly, and resists cracking over time.
For a lightweight garden structure, a 4-inch slab with properly placed reinforcement may be appropriate. For a heavier concrete floor for garden shed storage setup, mower storage, or a workshop with rolling equipment, JCD may recommend a thicker slab, a stronger reinforcement layout, or a more robust compacted base. A professionally installed concrete shed floor also helps keep doors aligned, reduces moisture intrusion, and gives stored equipment a cleaner, more durable surface.
Homeowners often compare different shed slabs, concrete pads for sheds, or concrete slabs for shed base options, but the best choice is rarely based on thickness alone. The performance of a shed concrete pad depends on the full system: excavation, sub-base compaction, drainage planning, steel placement, concrete strength, finishing, and curing. When JCD installs a concrete slab for shed floor projects, we focus on the details below the surface as much as the finished concrete you see.
Sizing and Reinforcing Your Concrete Pad for Shed Loads
The dimensions and thickness of your slab depend on how you plan to use your shed. For a standard storage shed housing light items like push mowers, bicycles, and garden tools, a 4-inch thick slab is often sufficient when the base is prepared correctly. If you plan to store heavy equipment, park a small tractor, or use the space as a heavy-duty workshop, increasing the thickness to 5 or 6 inches may be the better long-term choice.
A standard 10×12-foot slab at 4 inches thick requires approximately 1.5 cubic yards of concrete, which is why many homeowners choose professional installation instead of trying to mix dozens of bags by hand. A continuous, well-timed pour helps avoid cold joints and gives the slab a more consistent finish.
Thickness alone is not enough to prevent cracking under heavy loads. Concrete has excellent compressive strength but poor tensile strength, meaning it can crack when bent or stretched. To provide this necessary tensile strength, we install steel reinforcement. For light-duty storage slabs, a grid of welded wire mesh may be sufficient. For larger workshops or heavier loads, we install a grid of steel rebar, typically #3 or #4 bars spaced 16 to 24 inches apart, supported on chairs so the steel remains positioned in the middle third of the slab during the pour.
How JCD Builds a Concrete Pad for Shed Foundations in 6 Professional Steps
Building a durable concrete pad requires careful execution of each phase. From the initial excavation to the final cure, skipping steps or rushing the process can lead to structural issues later. Here is the professional process we use to ensure every slab we pour stands the test of time.
While some homeowners attempt DIY shed slabs, most projects benefit from professional site preparation, proper drainage planning, reinforcement placement, and concrete finishing to maximize long-term durability. That is especially true in Brevard County, where sandy soil, sudden downpours, and high heat can quickly expose shortcuts in the foundation.
Step 1: Site Preparation and Excavation in Sandy Soil
The first step is preparing the ground. In Brevard County, our sandy soil is easy to dig, but it can be highly unstable if not prepared correctly. We begin by marking out the footprint of the pad, adding working room around the form area so the slab can be built, braced, and finished properly.
Next, we excavate the area, removing all sod, organic material, and tree roots. Organic matter decays over time, creating hollow voids under the concrete that can cause the slab to crack and sink. We dig down to a depth that accounts for both the gravel sub-base and the thickness of the concrete slab. Because of our high water table, we constantly monitor the excavation depth to avoid saturated soil that could compromise the stability of the foundation. The same attention to grading and base preparation is critical on larger residential surfaces such as concrete driveways, where drainage and compaction directly affect long-term performance.
Step 2: Building and Leveling the Formwork
Once the site is excavated, we build the formwork. We use straight 2×4 or 2×6 lumber to construct the perimeter frame, depending on the slab thickness and project requirements. The forms must be built to the exact dimensions of the planned slab and secured firmly enough to hold the pressure of wet concrete.
To ensure the corners are square, we verify the layout before the pour and brace the forms with stakes along the perimeter. This prevents bowing, shifting, or blowouts while the concrete is being placed. We also check elevation carefully so the finished pad supports the shed properly while still allowing water to move away from the structure.
Step 3: Adding and Compacting the Sub-Base
Pouring concrete directly onto raw sandy soil is a recipe for future settlement and cracking. Sand shifts easily under load and can wash away during heavy rainstorms. To prevent this, we install a stable sub-base.
We spread crushed angular stone or commercial road base inside the forms. This material interlocks when compacted, creating a rigid platform that distributes the weight of the slab. We compact the base in controlled layers using professional equipment to achieve the density needed for long-term support. This gravel layer also acts as a capillary break, helping reduce ground moisture movement through the slab and into your shed.
Step 4: Installing Steel Reinforcement
With the sub-base compacted, we install the steel reinforcement. Steel is essential for controlling shrinkage cracks and distributing heavy weight across the slab.
We lay out welded wire mesh or a grid of steel rebar inside the forms. A common problem with low-quality slab work is reinforcement left directly on the gravel base. If the steel sits at the bottom of the slab, it provides little structural benefit. We elevate the reinforcement using chairs, positioning the steel in the middle third of the slab’s thickness so it is fully encased in the concrete and able to resist tensile forces.
Step 5: Pouring 5000 PSI Concrete
Now comes the most critical phase: the pour. For most shed pads, a continuous ready-mix pour is the best way to achieve consistent strength, workability, and finish quality. It also helps avoid cold joints, which can occur when one batch of concrete begins to set before the next is placed.
At JCD Concrete Inc., we use a premium 5000 PSI concrete mix as our standard for residential projects, compared to the standard 4000 PSI industry baseline. This higher PSI rating provides superior resistance to heavy loads, abrasion, and our salty coastal air. However, even high-strength concrete can fail if the ground beneath it is poor. Proper base preparation and thorough compaction are just as critical to the long-term performance of your slab as the strength of the concrete mix itself. To learn more about how different mixes compare, read our detailed article on 4000 PSI vs 5000 PSI concrete.
Step 6: Finishing and Curing in Florida Heat
Once the concrete is placed in the forms, we quickly work to level and finish it. We use a screed to strike off excess concrete, then use finishing tools to smooth and prepare the surface. For shed pads, a light broom finish is often ideal because it provides traction without creating a rough surface that is difficult to clean.
In our hot Florida climate, concrete can dry out too quickly, which weakens the slab and causes surface cracking. We work efficiently to edge the slab and create control joints where needed. Once the concrete has set enough to resist surface damage, we begin the curing process by keeping the slab properly hydrated so it can gain strength instead of simply drying out.
Curing, Finishing, and Long-Term Maintenance
Curing is the chemical process of hydration, where cement bonds with water to form a strong crystalline structure. It is not simply drying; in fact, if concrete dries out too quickly, it will only reach a fraction of its design strength. We recommend keeping your new concrete pad damp for at least 7 days after the pour.
To prevent random, unsightly cracks, we cut control joints into the slab. These joints are pre-planned weak points that encourage any shrinkage cracking to occur in a neat, straight line at the bottom of the groove rather than across the face of your pad. We cut these joints to a depth of at least one-quarter of the slab’s thickness within 12 to 24 hours of pouring.
For long-term protection against oil spills, fertilizer stains, and salt air, we recommend applying a high-quality concrete sealer once the slab has fully cured (typically 28 days). We bring these same high standards of preparation, material selection, and finishing to all of our residential projects, including when we pour a concrete driveways in Brevard County.
Frequently Asked Questions About Shed Foundations
Choosing the right foundation can raise many questions for homeowners. Below is a quick reference table comparing common slab specifications, followed by answers to the most frequent questions we receive.
| Shed Size & Intended Use | Recommended Slab Thickness | Recommended Reinforcement | Base Requirement |
|---|---|---|---|
| 8×10 Garden Shed (Light storage) | 4 Inches | Welded Wire Mesh (6×6 W1.4) | 4 Inches Compacted Gravel |
| 10×12 Storage Shed (Mowers, tools) | 4 Inches | Welded Wire Mesh or #3 Rebar | 4 Inches Compacted Gravel |
| 12×16 Workshop (Heavy equipment) | 5 to 6 Inches | #4 Rebar Grid (18″ Spacing) | 4 Inches Compacted Gravel |
| Large Double-Door Garage Shed | 6 Inches | #4 Rebar Grid (16″ Spacing) | 6 Inches Compacted Gravel |
Can I pour a 10×12 concrete shed pad as a DIY project?
While pouring a small walkway or patio addition is a manageable DIY project for some homeowners, pouring a 10×12 shed slab is highly labor-intensive. A slab of this size requires about 1.5 cubic yards of concrete. If you choose to use bagged concrete, you will need to mix, pour, and finish approximately 60 bags of 80-pound pre-mix.
This requires a team of several people working without stop to ensure the concrete does not set before you finish placing it. Additionally, renting a ready-mix trailer or a professional mixer, hauling materials, and executing the finishing work within a tight time window can be stressful. Hiring a professional contractor ensures the job is completed quickly, safely, and with a perfectly level finish that prevents structural issues later.
How much does a concrete shed foundation cost?
The cost of a concrete shed pad depends on several factors, including the size of the slab, the required thickness, the site’s accessibility, and the amount of excavation and grading needed. While temporary foundations like wood or gravel have a lower upfront cost, they often require ongoing maintenance, repairs, or complete replacement within 10 to 15 years.
A professionally poured concrete slab represents a higher initial investment, but it offers unmatched long-term value. It will not rot, rust, or wash away, and it provides a permanent asset that increases your overall property value. When you work with us, we provide a detailed, high-level estimate that accounts for our premium materials and comprehensive site preparation, ensuring you get a foundation built to last.
How long should I wait before building my shed on the new concrete?
Concrete undergoes a chemical curing process that takes time to reach its full design strength. While concrete may feel hard to the touch within 24 hours, it is still relatively weak and susceptible to structural damage under heavy loads.
You should wait at least 7 days before placing your shed or storing heavy items on a newly poured slab. At the 7-day mark, concrete typically reaches about 70 percent of its final design strength. To prevent cracking or shifting, avoid parking heavy vehicles or placing localized heavy machinery on the pad until it has reached its full 28-day cure.
Conclusion: Build Your Shed on a Concrete Pad Made for Brevard County Conditions
Your backyard shed is an investment designed to protect your valuable tools, equipment, and personal belongings. The best way to secure that investment is by placing it on a permanent, professionally installed concrete foundation. A properly built slab prevents moisture damage, resists shifting and settling in sandy Florida soil, and stands up to intense seasonal weather.
At JCD Concrete Inc., we bring over 40 years of owner-operated experience to concrete pads and slabs throughout Brevard County. Our team understands local soil conditions, drainage challenges, reinforcement requirements, and the importance of using premium 5000 PSI concrete for long-term performance. Whether your project is in Melbourne, Palm Bay, Titusville, Cocoa, Rockledge, Merritt Island, Viera, or a nearby coastal community, we build shed foundations with the same care we bring to driveways, patios, sidewalks, garages, and other residential concrete work.
If you need a concrete pad for shed construction, a concrete floor for a shed, or a durable concrete slab for shed floor projects, JCD Concrete Inc. can help you plan and install a durable concrete pad or slab built for your property, your structure, and Brevard County’s demanding climate.